http://i1208.photobucket.com/albums/cc372/Rodaina_Tarek/3-5_zpsb40aaa99.png http://i1208.photobucket.com/albums/cc372/Rodaina_Tarek/2-5_zps5dbe0d62.png http://i1208.photobucket.com/albums/cc372/Rodaina_Tarek/4-1_zps77e392b2.pnghttp://i1208.photobucket.com/albums/cc372/Rodaina_Tarek/5_zpsdb4a21cf.png
Showing posts with label Tutorials. Show all posts

Saturday, October 12, 2013

Tutorial: Antique Lace Bracelet

Hello there crafty friends and followers! Have you missed me? Wow almost two months without blogging! Life's been crazy over here; first days at college, moving and what not. But I'm here now and I'm sharing a lovely new tutorial with you guys!

Antique Lace Bracelet Tutorial

I recently got a package of the most gorgeous lace and antique charms from Wholeport and I knew right away what I'm going to do with them. Here's an easy peasy picture tutorial for you guys.
List of all the products used at the end of the post. Enjoy!


What's great about this bracelet is that it can be personalized with any photo. Think about the endless possibilities, mother's day, gift for grandma..etc.
You can also use leather or cord instead of lace so this bracelet can be tweaked in so many ways!

Product List:
Lace Trim - Wholeport
Antique Pendant - Wholeport
Glitter Stickers - K & Company
Seal-Itz - Photo Jewelry Making

Sunday, February 24, 2013

Tutorial: Transparency Bookmarks

Hello my lovelies! Did you miss my tutorials? Well, I'm here today with a quick and fun project.
There are so many possibilities that even your kids can make their own version of these bookmarks!


 For the first method, you'll need:


Plus some ribbon and beads (optional)
And you know what makes this a wonderful recycling project? You can use any clear packaging that you might well have at home! Hooray!

First, cut your transparency sheet lengthwise into wide strips, or in my case, an scalloped oval. 
Then, using a hole punch, make a small hole. This is where the ribbon should go.


Now to apply the rub-on image, you'll want to cut around the selected design carefully with your scissors to remove it from the sheet of Rub-ons. After that, position the image over your bookmark to make sure everything fits. 
The Eiffel tower was a little bit bigger than my bookmark so I had to crop some bits from the bottom. Oh well..


The next step is to peel off the backing and carefully position the image, sticky side down, on your bookmark. And with a Popsicle Stick or any similar tool, start rubbing and rubbing, and rubbing some more! 
 After you've firmly rubbed over the entire design, slowly pull back the protective sheet from the transfer. If any part of the design hasn't completely adhered to the bookmark, don't panic! Carefully place back over and rub again.

And voila! Here's your bookmark after applying the rub-on image.

Now I wasn't sure how durable it would be considering that transparency sheets are not that much of a porous surface and I was afraid that it might get rubbed off just as easily as it was rubbed-on!So what I did was coat it with a thin layer of spray sealer, and sure enough, it did the trick! You can use Mod Podge, too. The only downside would be the visible brush strokes. But if you ask me, I can live with that!
The last step is to add a length of ribbon. And some pretty beads just for the fun of it!

That's it! I hope you've found this helpful. Feel free to leave me a comment. And you guys are always welcome to follow my blog and keep up with all the DIY projects and tutorials!


Have a craftylicious day. xx

P.S. I have Blog Candy!
C is for CRAFT!
Click on the picture to go to the candy post.

Saturday, January 26, 2013

Tutorial: Valentine Bunny Brooch

Is it just me or have you all started crafting your pants off for Valentine's day? This year, I've come up with the idea of making sweet little brooches as gifts for my cousin's schoolmates. Making one brooch took me 10-15 minutes, which makes this a quick project that you can whip up while the kids are napping!

In case you haven't noticed, I have a new sponsor! (the very first of many to come, hopefully!)
Wholeport.com is an online craft store with all sorts of supplies. From baking to soap and jewelry making, Wholeport has everything you'll probably ever need all in one place!
They've sent me a package full of colorful blocks of polymer clay to try and make something creative out of it. The perfect excuse for some "crafty extra-time"!

Well here you go:

This is it. Simple and sweet!
If you have any questions, just leave me a comment (and even if you don't, I love hearing from all of you!)
Don't forget to visit Wholeport.com and check out all the beautiful supplies they have.
Here's one last picture of my bunny brooch:

 Isn't it adorable?

Oh, I almost forgot to mention that they have a "free sample of the day" deal where you can get one of their products completely free of charge. (Yep, they even shipped it all the way to Egypt!)
Follow up with them on Facebook so you don't miss any of the good deals!


xo,                                    
Sharing this with:

homework

Sunday, May 6, 2012

Tutorial: Leather & Charm Bracelet

Here are some fun summer bracelets that I've been working on since I've gone to some awesome craft stores with my bestie on this last weekend.
I thought you guys might want a tutorial, so instead of asking I just went ahead and made you one!
I hope you like it.


•Flat nose pliers.
•Braided leather/ leather cord.
•Lobster clasp.
•Jump rings.
•Two closures. (I asked for special ones for leather)
•Charms.


Measure the braided leather cord around your hand and cut it slightly shorter than your wrist. Only just a centimeter or so. Use sharp scissors, we don't want any wobbly ends. (my pliers have built-in scissors! Woot!)

 Next, insert each end of your cord into a closure. You'd be able to get it in quite easily.

 After you've got the cord tucked in nicely, gently squeeze the last bit of the closure to make it hold the cord tightly and keep it from slipping.

 Repeat the last 2 steps for the other side as well.

 Hold a jump ring in one hand and your pliers in the other, and gently twist the jump ring open by pulling it in two opposite directions. I hope this makes sense!

 Slip your clasp in while you're still holding the jump ring with the pliers.

 Slip one end of the cord in the other side.
Close the jump ring using your pliers (and hand if necessary).
  • Insert another jump ring on the other end of the cord, too.

 Pick a cute charm and insert a jump ring into it. Don't close it just yet, wait for the next step!

Attach the charm to the other side of the cord.


You're done! See? Easy peasy lemon squeezy! 
Wear your awesome bracelet with pride. :)

Here are a few more I've made:


I'm in love with the little owl charm! Aren't they all adorable?
Alrighty then, I'll see y'all some time soon. xx


Sunday, April 22, 2012

Tutorial: Teabag Bookmarks out of Wipes

To celebrate Earth Day I made these fun bookmarks. It's such a shame that I didn't come up with that idea, actually my bestie in the U.S. did and sent me pictures of her bookmarks. They were just too cute not to replicate! Thank you Sara. ♥

Supplies:
Wipes
Thread
Scissors
White glue/Elmer's glue
Tea tags or cardstock to make your own


1- Cut in half.


2- Fold in half


• Cut little rectangles according to the size you want. Mine made 3 little teabags.


3- Snip one side.


4- And the other. (see how they don't match perfectly? it's okay because we'll fold the top to make it look neat later.)


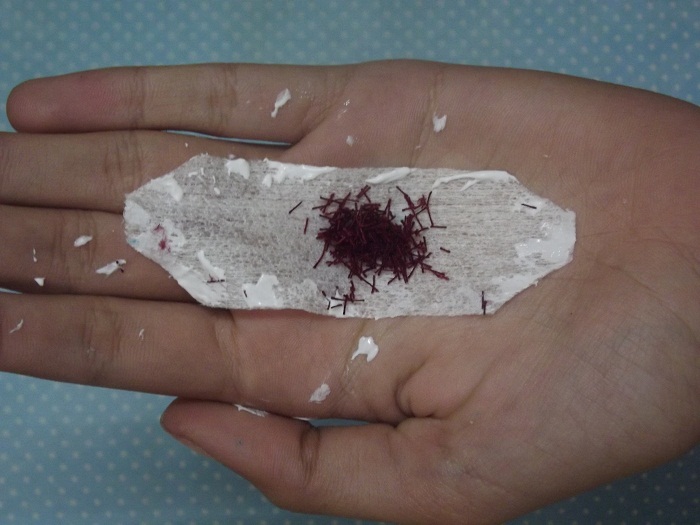
5- Tie a few rounds of dark colored thread around your fingers. We are now making "tea" to put into the little bag. ;)


6- Chop, chop! Cut it into little pieces.


7- Unfold your teabag and add the little bits of thread to the center.


8- Apply glue to the sides. Oops, I made a complete mess because the glue was stuck and I had to use my finger! lol

9- Cut a piece of thread/yard that is long enough to stick out of a book and "sandwich" itbetween the two layers of wipes. Next glue the other end to a real tea tag or just cut a scalloped edges square of cardstock to make your own.

Voila!

Any Virgos here? lol.
The book is Girl, 15, charming, but insane by Sue Limb.


Have you recycled anything today? I would love to hear your thoughts about my little project.

Have a great day,                            


They are talking about me at CraftGossip.com

Tuesday, April 10, 2012

Tutorial: Glittered Easter Eggs


Sorry I didn't take pictures after this step because my hands were covered in glue and glitter!
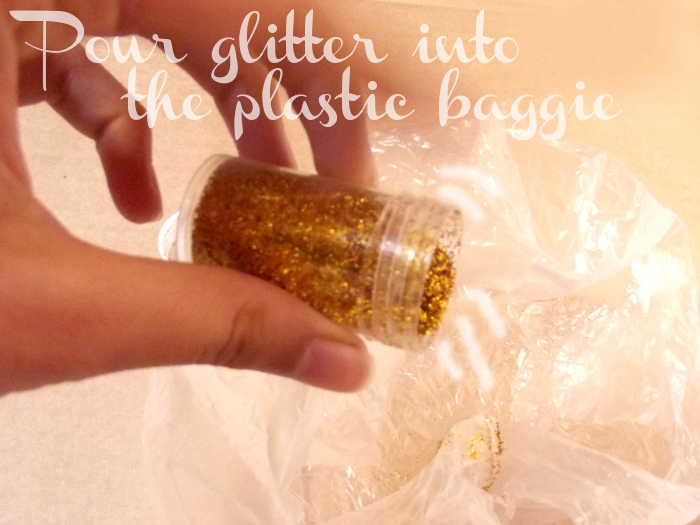
•Gently lay your egg in the plastic bag and roll it around so it's all covered in glitter.
•Make sure you didn't miss a spot.
•Take the egg out of the  bag and shake off any excess glitter. (now you can return the remaining glitter back into the container, mess free!)
•Use an acrylic sealer, Modge Pod, or clear nail polish to seal the egg.

That's it!


Have a great day,